
A slice in golf refers to a shot that curves dramatically to the right (for right-handed players) due to a misalignment between the clubface and swing path. Among amateur players, it’s one of the most frequent problems and a serious obstacle to consistency.
Slicing reduces distance, hurts accuracy, and drains confidence. Many golfers struggle to correct it because they overlook the root causes, like an open clubface at impact, an outside-in swing path, or incorrect grip and wrist positions.
Fixing a slice permanently starts with understanding what creates it and applying simple drills to reverse those habits. Consistent practice combined with small adjustments can reshape your swing for straighter shots.
Fix Fundamentals First
Before addressing swing path or wrist angles, foundational elements must be corrected. Slices are often symptoms of poor grip or flawed setup.
Without solid fundamentals, even the most advanced drills will fall short. Attention to detail in grip and alignment can drastically improve clubface control and reduce the slice.
Below are key areas to focus on, each supported with bullet points for quick reference.
Grip Check
A weak grip leads to an open clubface at impact. Golfers who see the ball leak right typically overlook how much hand placement affects face control.
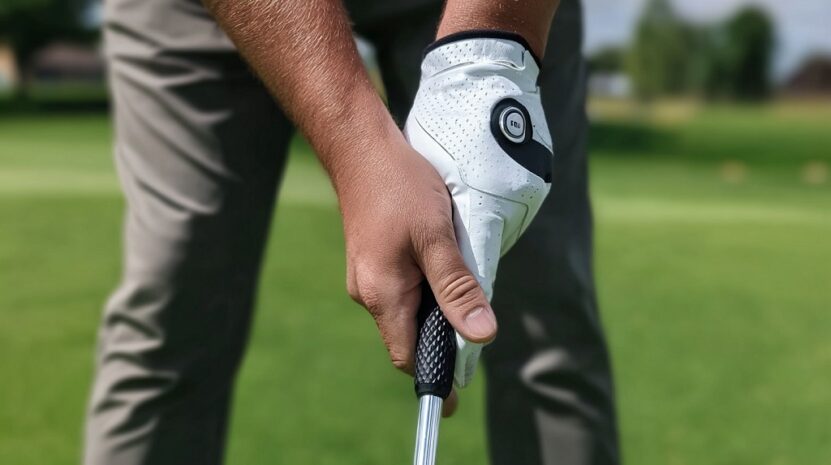
Strengthening the grip promotes a square clubface, reducing unwanted spin and enhancing ball flight. Hank Haney recommends a grip that shows three knuckles on the lead hand for right-handed players. HackMotion sensors confirm improved wrist function and control with this setup.
Hands should be placed diagonally across the fingers for better leverage and a hinge. Palm-based grips limit control and exaggerate slices. Grip pressure must be firm enough for stability but soft enough for fluid motion.
Key grip tips:
- Lead hand should show 2–3 knuckles at address
- Grip across fingers, not in the palm
- Maintain light-to-moderate grip pressure
- Trail hand should support the club without overpowering it
- Use visual checkpoints or training aids to validate hand placement
A secure yet relaxed grip allows wrists to hinge naturally while keeping the clubface on track through impact.
Proper Setup and Ball Position

Poor ball position contributes to slices by altering swing direction. A ball placed too far forward encourages an outside-in path that leaves the face open at contact.
Alignment must be square. Feet, hips, and shoulders should all point parallel to the target line. Misalignment often causes compensation mid-swing, leading to inconsistent strikes and sidespin.
Balance matters just as much. Weight should be evenly distributed, with slight pressure favoring the balls of the feet. This athletic stance supports better rotation and timing.
Essential setup principles:
- Ball should be positioned just forward of center for irons, off the lead heel for drivers
- Feet, hips, and shoulders should align parallel to the target line
- Weight balanced between both feet, with slight bias toward lead side on short irons
- Spine angle should remain neutral, not tilted excessively
- Eyes should remain directly over the ball or just inside the target line
The “Feet Together Drill” builds consistency. Start with both feet touching and make gentle swings. This drill limits lower body movement and sharpens rhythm.
Once timing improves, gradually widen the stance while maintaining tempo.
Drill-Based Fixes That Actually Work
Fixing a slice requires physical adjustments and muscle memory reprogramming. Drills help retrain the brain and body to deliver the club with the correct path and face angle.
Consistency and repetition matter, but so does choosing drills that deliver clear feedback and promote in-to-out movement.
Every drill below targets a specific part of the swing, from grip to wrist action to club path, and each provides a tangible way to measure progress.
Drill #1: Just Miss the Stick
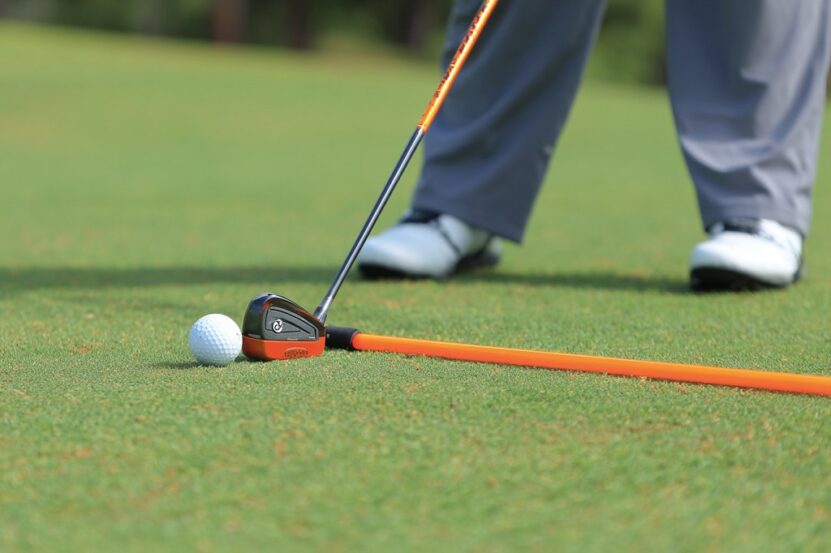
Using an alignment stick as a visual obstacle trains the body to swing from the inside.
Place the stick just outside the target line, slightly parallel to it.
Instructions and benefits:
- Place the stick outside the ball, pointing slightly right of target (for right-handed players).
- Take swings without contacting the stick.
- Focus on feeling the club travel from inside the target line to outside.
Results:
- Encourages in-to-out swing path.
- Prevents over-the-top motion.
- Builds spatial awareness during downswing.
Drill #2: Motorcycle Drill
Lead wrist control determines how the clubface squares at impact.
Many slicers suffer from an extended wrist, leaving the face open. To correct it, mimic the motion of revving a motorcycle.
Execution steps:
- At the top of the backswing, feel the lead wrist “rev” downward.
- Maintain flexion through the start of the downswing.
- Repeat slowly to ingrain muscle memory.
Benefits:
- Promotes lead wrist flexion.
- Increases clubface closure rate.
- Reduces face angle variability through the hitting zone.
Drill #3: Headcover Path Drill

This drill trains an inside swing path by giving immediate feedback. A headcover acts as a barrier, encouraging the golfer to miss it on the way down.
Setup and practice:
- Place a headcover about one foot behind and just outside the ball.
- Make full swings without contacting the object.
- Film swings for feedback and improvement tracking.
Key benefits:
- Promotes shallow, inside path.
- Discourages steep and outside-in motion.
- Builds discipline in sequencing lower and upper body.
Drill #4: Haney’s 3-Step Loop Fix
Hank Haney’s drill exaggerates an inside move using a three-part motion.
Slicers often need to feel something extreme before correcting a fault. Start with a loop, then integrate body rotation, and finally merge both into full motion.
Steps to follow:
- Begin with a backswing that loops slightly behind your body.
- Add a controlled body rotation through the swing.
- Blend both into a fluid motion, maintaining loop and rotation.
Results expected:
- Retrains hand path and body synchronization.
- Reinforces in-to-out swing with draw bias.
- Creates exaggerated feel to break old patterns.
Drill #5: Fix Your Face to Path
A slice often results from a mismatch between face angle and swing direction.
The drill uses visual feedback to teach what proper clubface orientation feels like relative to the path.
How to perform it:
- Place two visual markers down the range – one just right and one just left of the target.
- Practice hitting shots that start right and curve left, matching face and path.
- Observe ball flight and adjust based on direction and curvature.
Main benefits:
- Improves clubface awareness.
- Builds consistent match between swing path and face angle.
- Reduces accidental face rotation late in the swing.
Equipment Check
Before blaming mechanics alone, take time to assess the gear in use. Equipment can influence swing outcomes significantly, especially when it amplifies flaws like an open face or incorrect path. For many amateur players, clubs are bought off the rack without consideration for individual swing characteristics.
That’s a mistake. Matching the right specs to swing tendencies can go a long way toward reducing slices or even eliminating them.
Several equipment factors can aggravate or ease slicing, and the most critical ones are listed below.
Key equipment factors that influence slicing:
| Equipment Factor | Problem When Incorrect | Solution / Adjustment |
|---|---|---|
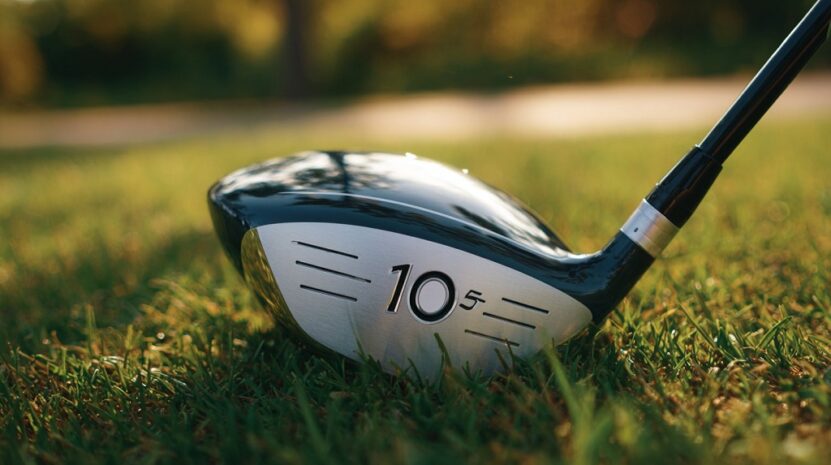
| Driver Loft | Low loft (8°–9°) increases sidespin, reducing backspin and worsening slices. | Use a higher loft (10.5° or more) to boost backspin and stabilize ball flight. |
| Shaft Flex | Shaft too stiff delays face closure, causing an open clubface at impact. | Choose regular or senior flex shafts to help square the face, especially for slower swing speeds. |
| Adjustable Drivers | Neutral or open settings may maintain slice patterns. | Adjust hosel to close face slightly; shift weight toward heel to promote a draw. |
| Club Length & Lie Angle | Clubs too long or too flat cause difficulty squaring the clubface and promote an outside-in path. | Opt for a slightly shorter club or increase the lie angle for better swing path and face control. |
| Grip Type & Size | Thick or slick grips reduce hand control and impair proper release. | Use thinner, tackier grips to increase clubface awareness and improve release timing. |
- Loft
- Shaft flex
- Shaft weight
- Lie angle
- Face angle settings
Summary
Fixing a slice is not only possible, it’s inevitable with the right drills and daily discipline. Begin with grip, setup, and wrist angles before layering swing path drills.
Combine “Just Miss the Stick,” “Motorcycle,” “Headcover Path,” and Haney’s loop fix for a comprehensive retraining process. Use visual tools to sync face and path through impact.
Drills must become second nature. Practice regularly, measure progress, and stay patient. For players who continue to struggle, a session with a PGA coach may provide targeted feedback and quick breakthroughs.